Windows Services là gì?
- Windows Service có thể hiểu nôm na như là 1 ứng dụng chạy nền trong một khoản thời gian dài từ khi bạn bật máy tính cho đến khi tắt nó đi.
- Nó có thể tự động chạy khi máy tính được boots lên, có thể restart hay pause mà không cần một sự tác động nào của người dùng tới các công cụ liên quan tới UI.
- Có thể cài đặt dễ dàng nhờ công cụ hỗ trợ có sẵn của Visual Studio exe thông qua Command Line. Bạn chỉ cần trỏ đúng thư mục có sẵn của file exe và execute nó. Thế là bạn đã cài đặt xong Windows Service.
Tại sao phải sự dụng WS
- Một trong những yêu cầu quan trọng của khách hàng là: có một ứng dụng chạy ngầm mỗi ngày để tổng hợp data dùng để xuất ra report, đồng bộ data từ các server, xem hôm nay đã có bao nhiêu sản phẩm được bán, hoặc là gửi mail cho các người dùng khi tài khoản của họ đã hết thời gian sử dụng, v…v
- Xây dựng 1 WS có thể được xem là 1 giải pháp tối ưu cho những tình huống ở trên mà không cần người dùng thao tác gì tới WS cả, mọi thứ đều được chạy ngầm trên máy tính/server của họ.
Viết một Window Services đơn giản
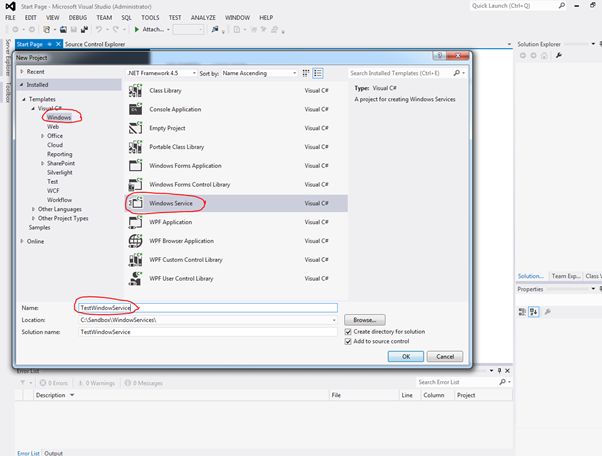
Open Visual Studio and from the menus select "File" -> "New" -> "Project...".
A New Project window will open. Choose "Visual C#" >> "Windows" project type and select "Windows Service" from the right hand side and name the project "TestWindowsService" as shown in the following screenshot.
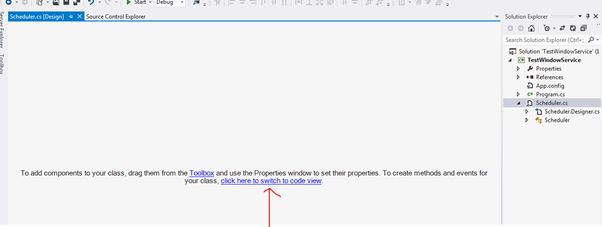
After you click "OK", the project will be created and you will see the design view of the service as shown in the following screen. Right-click the "Service1.cs" file in Solution Explorer and rename it "to" Scheduler or any other name that you want to give it. Then click “click here to switch to code view”.
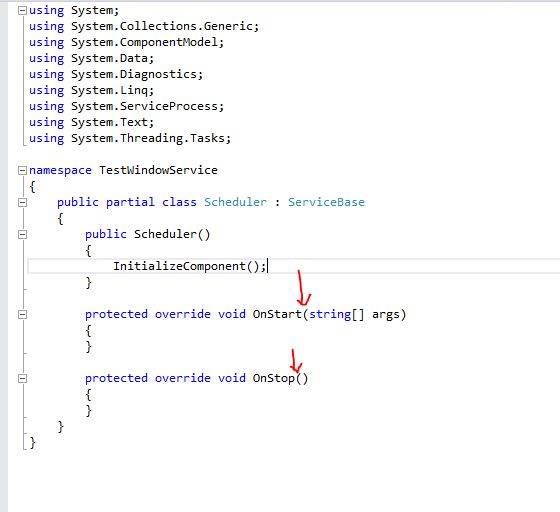
In the code view, you can see two methods called OnStart() and OnStop(). The OnStart() triggers when the Windows Service starts and the OnStop() triggers when the service stops.
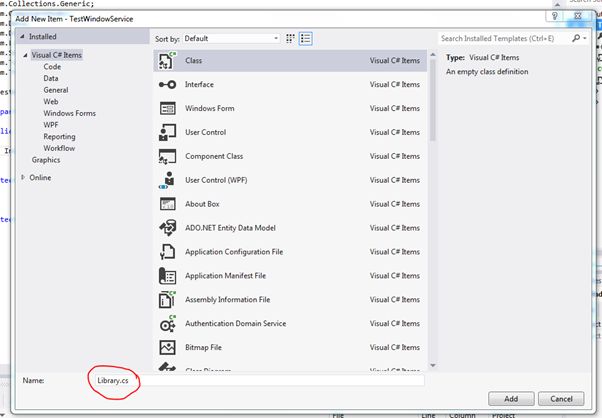
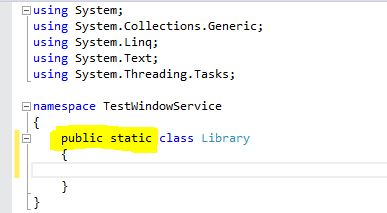
Right-click the TestWindowService project, add a new class and name it "Library.cs". This class will be useful to create the methods that we require in the project. If your TestWindowService is a big project, you can create a ClassLibrary project and reference it to your TestWindowService.
Library.cs
Make the class public and declare it as a Static class.
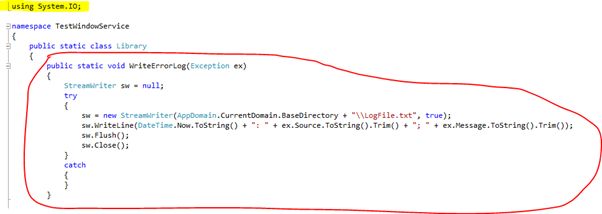
Create a log method (WriteErrorLog) to log the exceptions.
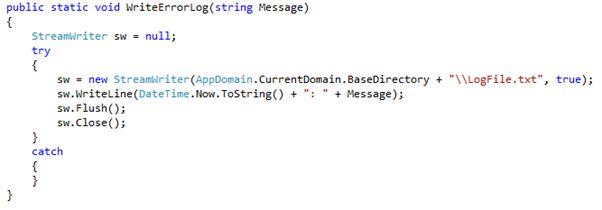
Create one more log method (WriteErrorLog) to log the custom messages.
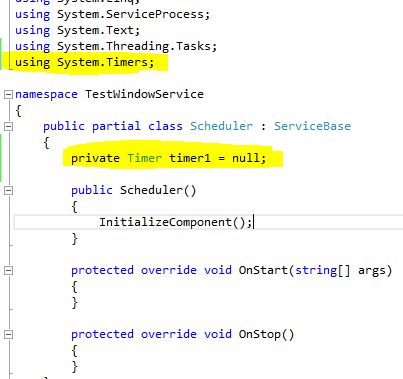
Scheduler.cs
Now return to our Scheduler.cs file and declare a Timer.
Write the following code in the OnStart() method and timer1_Tick():
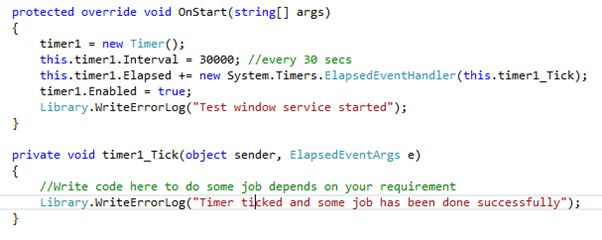
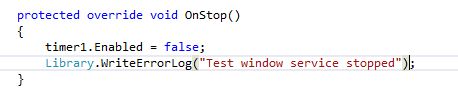
Write the following code in the OnStop() method:
Scheduler.cs [Design]
Now return to the Scheduler.cs [Design] and right-click on the editor window then click "Add Installer".
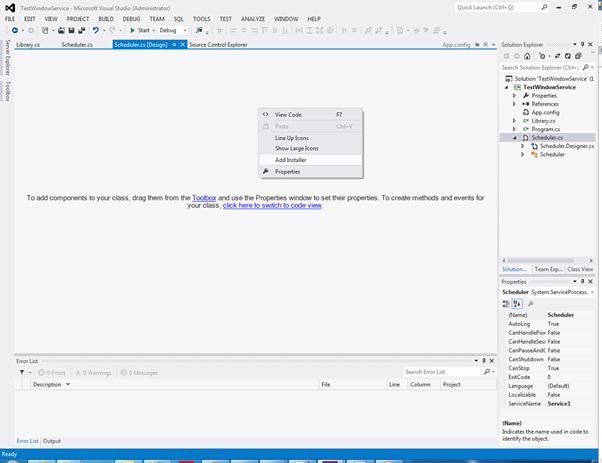
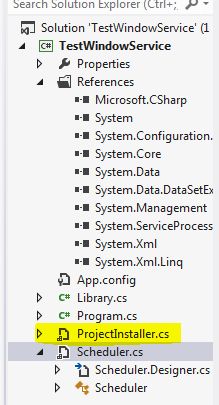
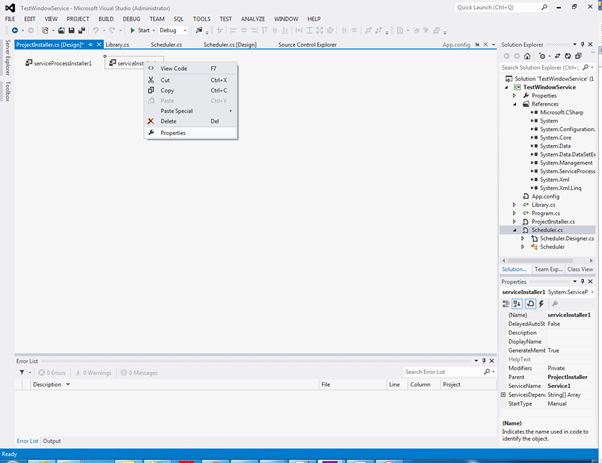
Then you can see that there will be a new file called "ProjectInstaller.cs" as shown in the following.
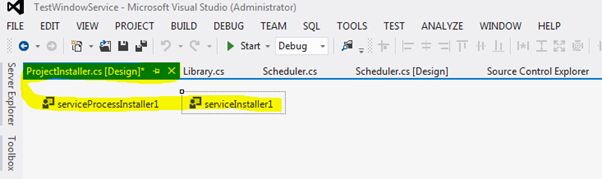
Right-click on the "serviceInstaller1" and click "Properties".
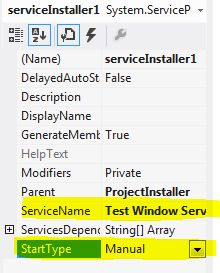
Change the ServiceName to "Test Windows Service" (or your own name) and StartType to "Manual" (or you can choose "Automatic" if you need this service to be automatic).
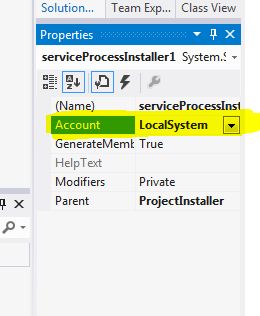
Right-click the serviceProcessInstaller1, go to the properties window and change "Account" to "LocalSystem".
Build the project to see the .exe file at the location where you created the solution.
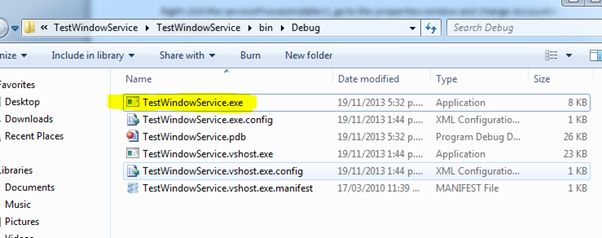
That's all. Your Windows Service is all ready to install in your machine.
Installing the Windows Service
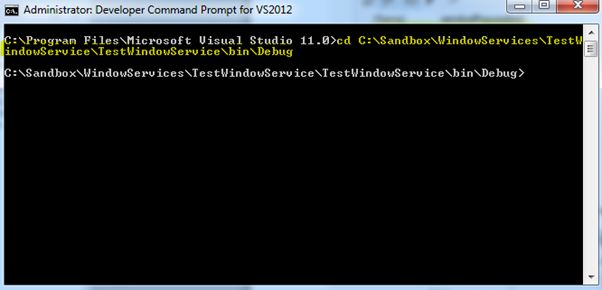
Go to "Start" >> "All Programs" >> "Microsoft Visual Studio 2012" >> "Visual Studio Tools" then click "Developer Command Prompt for VS2012".
Type the following command:
cd <physical location of your TestWindowService.exe file>
in my case it is :
cd C:\Sandbox\WindowServices \TestWindowService\TestWindowService\bin\Debug
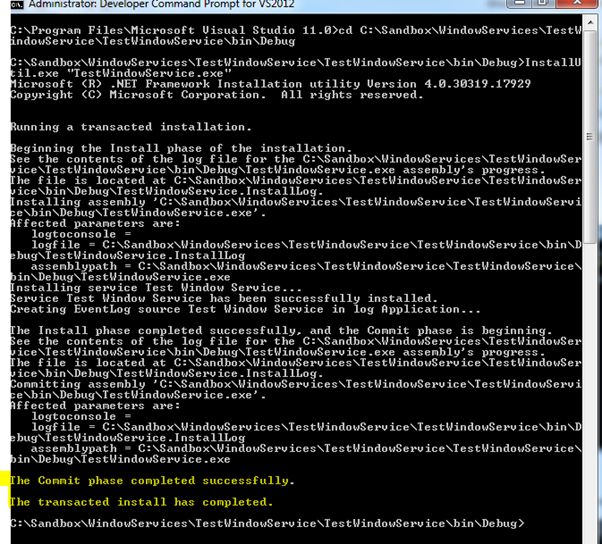
Next type the following command:
InstallUtil.exe “TestWindowService.exe”
and press Enter.

Here you go, the TestWindowService is installed successfully.
How to start the Windows Service
Since we chose StartType = Manual, we must start the Windows Service manually by visiting the "Services and Applications" window in the computer.
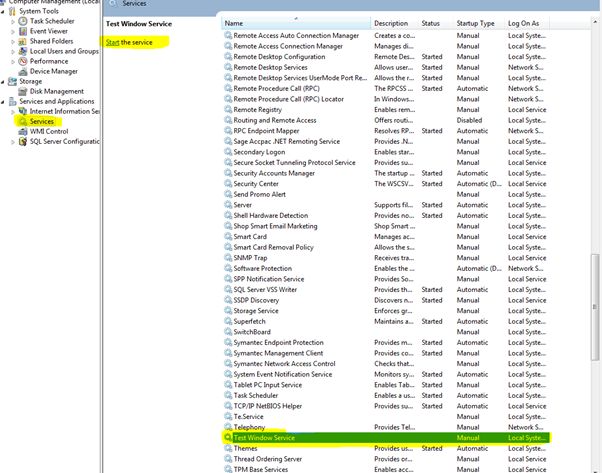
Select the Test Windows Service and click "Start" to start the service. Go to the "TestWindowService.exe" location to see the logs.
LogFile.txt
Since we are tracking our Windows Service by writing some logs to a .txt file called LogFile.txt, we can test the working condition of our Windows Service by looking at this log file.
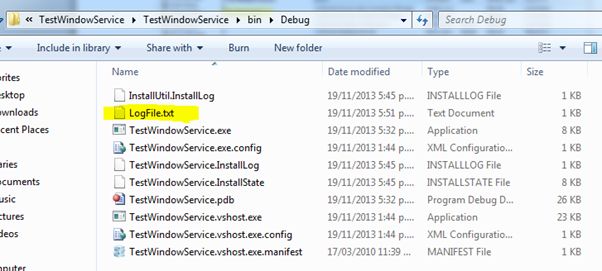
As you can see in the preceding screen, you can find the LogFile.txt file at the physical location that your TestWindowService solution exists.
Click the LogFile.txt to see the logs, whether our service is doing the job that we set it to do for every 30 seconds.
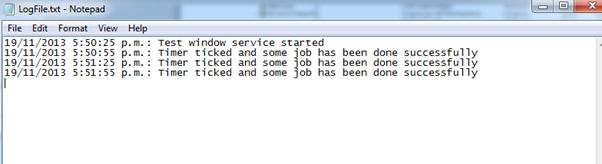
If you look at the preceding log file, we can prove that our Windows Service is running and doing the job that we wanted on a 30 seconds interval.
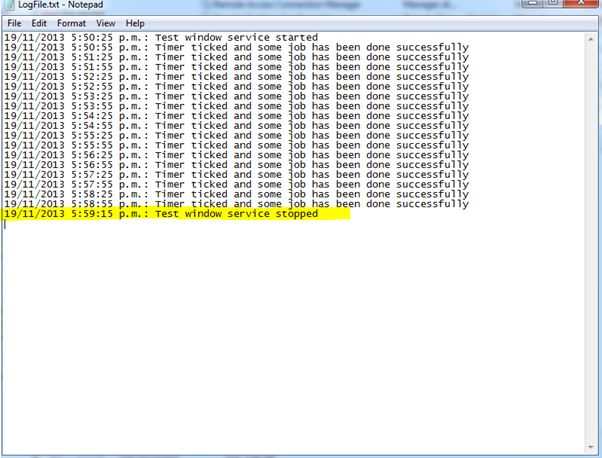
Stop the Windows Service
To stop the Windows Service, just click "Stop" link in the Services window by selecting our TestWindowService.
Logfile after stopping our service:
Type the following two commands in the "Developer Command Prompt for VS2012" to uninstall the TestWindowService.exe.
- cd <physical location of your TestWindowService.exe file>
and press Enter. In my case it is:
cd C:\Sandbox\WindowServices \TestWindowService\TestWindowService\bin\Debug
- InstallUtil.exe /u “TestWindowService.exe”
And press enter.
After executing the preceding commands, the TestWindowService will be uninstalled from your computer.
Summary
In this article, I explained how to develop a Windows Service and install it using InstallUtil.exe from a command prompt.
I believe that I have explained each step clearly that can be easily understandable for a beginner to develop and install a Windows Service.
Xem thêm: Sự khác nhau giữa Web Service, WCF, WCF REST, Web API
Nguồn: Tham khảo trên internet


![[Lập Trình] Cách tạo một web api đơn giản bằng asp.net](/images/ASP-MVC-WEB-API-COURSEWARE-IMAGE.jpg)
![[Lập Trình] Tạo comment cho bài viết sử dụng ngôn ngữ asp.net](/images/hoc-lap-trinh-bat-dau-tu-dau.jpg)


![[Lập Trình] Thêm, xóa và hiển thị hình ảnh bằng javascript](/images/hoc-lap-trinh-ngon-ngu-nao-tot-nhat-28012016-1.jpg)